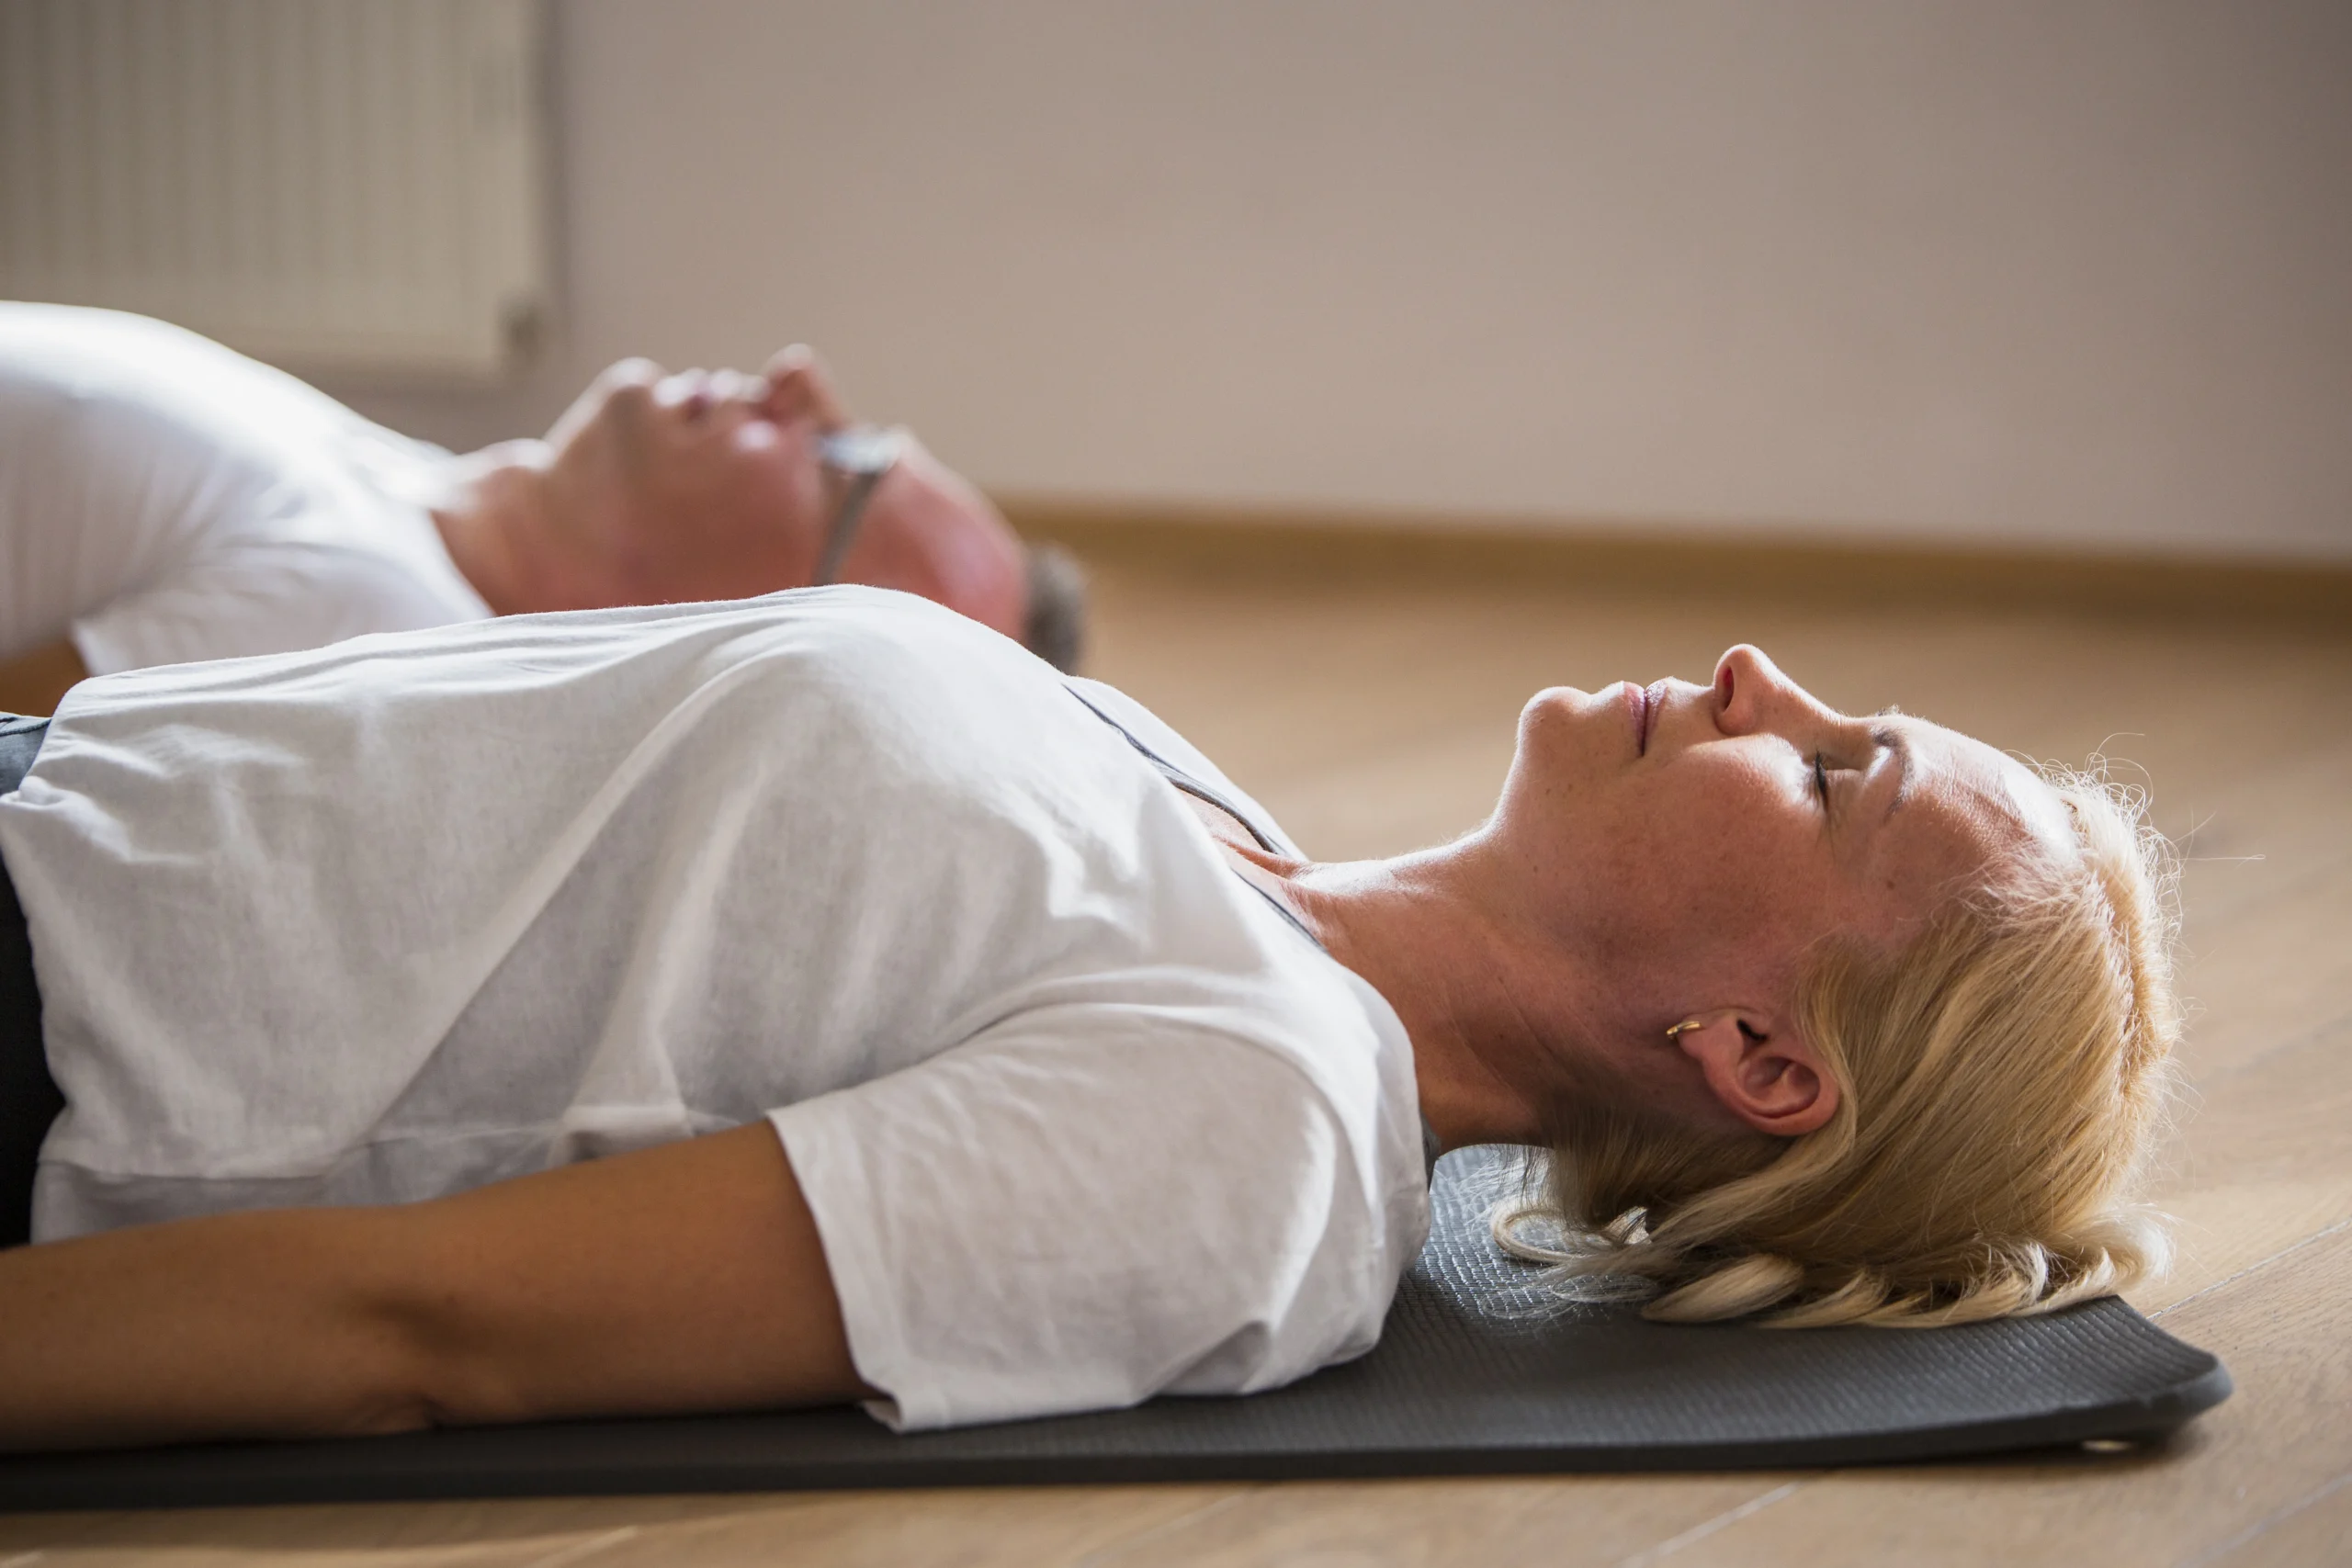
Sarvangasana Benefits: Shoulder Stand Guide & Modifications
✨ QUICK ANSWER Sarvangasana (shoulder stand) is an inverted yoga pose where the practitioner balances on the shoulders and upper […]
 Astrong
✨ QUICK ANSWER
Sarvangasana (shoulder stand) is an inverted yoga pose where the practitioner balances on the shoulders and upper back with legs vertical. This “queen of poses” reverses blood flow, activates the thyroid and parathyroid glands, improves circulation, and regulates the nervous system within 2-5 minutes. Advanced practitioners hold for 5-10 minutes. The pose requires proper alignment to protect the cervical spine and suits intermediate practitioners with qualified instruction.
Most yoga practitioners have heard the phrase: “Shoulder stand is the queen of yoga poses.”
But few understand why.
While flashy arm balances and deep backbends get attention, shoulder stand works quietly—and profoundly—on the systems that govern your entire physiology: your endocrine glands, your circulation, your nervous system, and your metabolism.
When you invert your body in shoulder stand, you reverse the relationship your body has with gravity. Blood flows upward from your legs toward your heart without muscular effort. Pressure increases around your throat, stimulating the thyroid—the master gland that controls metabolism, energy, weight, and mood. Lymph drains from your lower body. Your nervous system downshifts into restoration mode.
All of this happens not through stretching, not through building strength, but through the simple act of turning your body upside down.
This guide covers everything about Sarvangasana benefits: what it is, why it works, how to practice it safely, which modifications suit your body, when to use it in your practice, and exactly when to avoid it. Whether you’re seeking thyroid support, better circulation, hormonal balance, or simply want to add a powerful inversion to your practice—this is your complete resource.
Ready to discover why shoulder stand earned its royal title? Let’s begin.
WHAT IS SARVANGASANA? THE QUEEN OF YOGA POSES
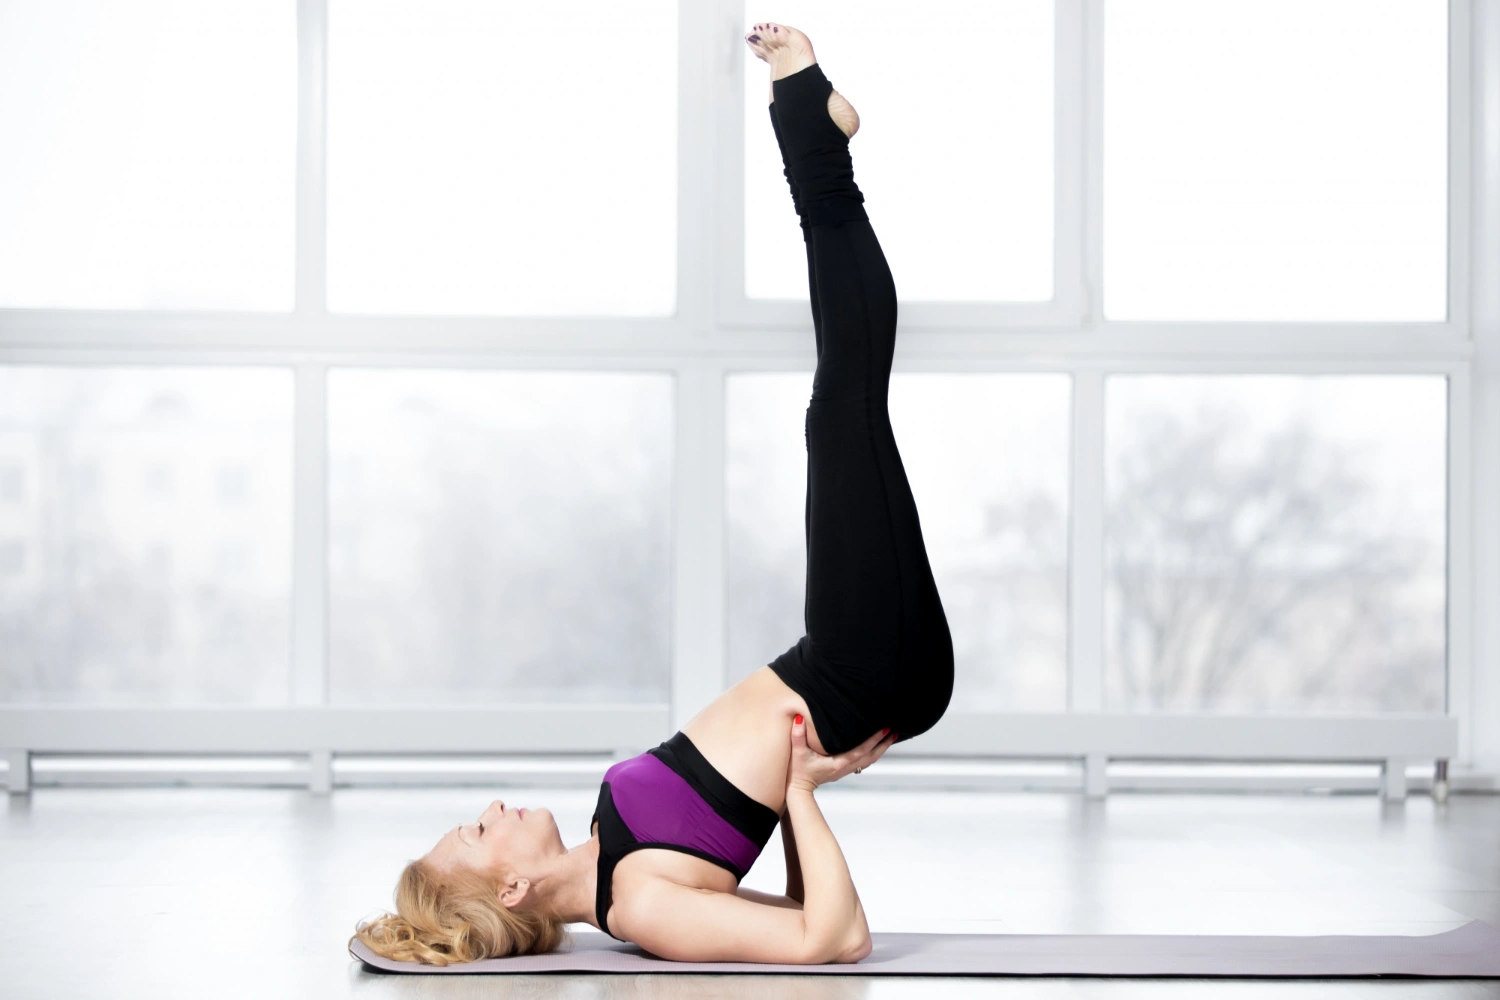
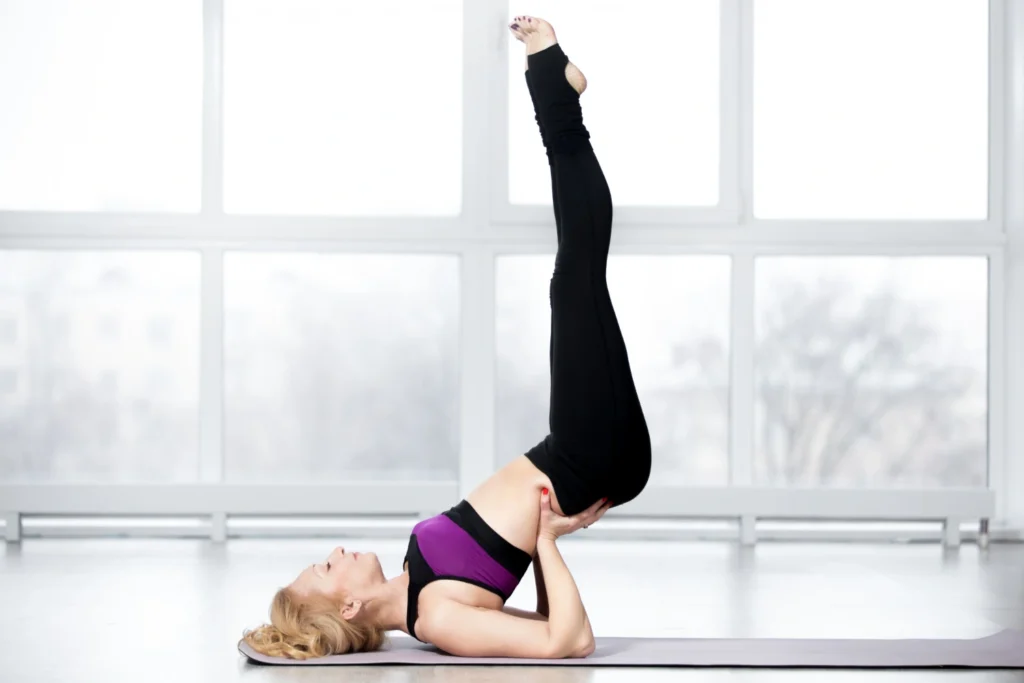
Sarvangasana (सर्वांगासन) is an inverted yoga pose where the practitioner lies on their back, then presses the shoulders and upper back against the ground while lifting the hips and legs vertically toward the ceiling.
The Sanskrit name reveals its purpose:
Sarva = All Anga = Limbs/Body Asana = PoseSarvangasana literally means “pose for all the limbs”—because when performed correctly, it benefits the entire body from head to toe.
Why It’s Called “The Queen of Yoga Poses”
In classical yoga philosophy, inversions are considered the most powerful physical practices. Among inversions, shoulder stand holds the position of greatest importance because it:
Directly stimulates the thyroid gland – The only yoga pose that applies direct pressure to the master gland of metabolism Reverses circulation without muscular effort – Gravity assists the return of blood from the lower body Accesses the parasympathetic nervous system – The inversion combined with gentle pressure calms the entire nervous system Is accessible to most practitioners – Unlike headstand (which requires neck strength) or handstand (which requires arm strength), shoulder stand is achievable for intermediate practitioners with basic alignmentThe Physiology: What Happens in Shoulder Stand
When you hold shoulder stand:
Within 30 seconds:
Blood pressure increases in the head and neck region Carotid arteries (blood vessels in the neck) sense the increased pressure The vagus nerve receives a “safety signal” that rest-and-digest mode is safe Parasympathetic nervous system activation beginsWithin 1-2 minutes:
Thyroid and parathyroid glands experience direct pressure and stimulation Thyroid hormone production increases Metabolic rate begins to shift upward Heart rate slowsWithin 5 minutes:
Significant blood return from legs and lower body Edema (swelling) in ankles and feet begins to decrease Lymphatic drainage from lower extremities improves Spine experiences gentle decompressionAfter releasing the pose:
Nutrient-rich blood floods the brain Hormonal cascade continues for 20-30 minutes post-practice Nervous system remains in parasympathetic dominance for 1-2 hoursSarvangasana vs. Other Inversions
| Shoulder Stand | Intermediate | Medium | Direct pressure | General practice, thyroid support |
| Headstand | Advanced | High | Mild indirect | Experienced practitioners |
| Legs Up Wall | Beginner | Low | No stimulation | Daily relaxation, beginners |
| Forward Fold | Beginner | Low | No stimulation | Mild reversal, hamstring stretch |
| Downward Dog | Beginner | Low | No stimulation | Warm-up, shoulder strength |
Shoulder stand stands unique as the inversion that provides direct thyroid stimulation while remaining accessible to intermediate practitioners.
NINE PROVEN BENEFITS OF SARVANGASANA
1. Activates the Thyroid Gland & Regulates Metabolism
The thyroid gland is the master control center of metabolism—it determines how fast or slow your body burns calories, generates heat, and converts food into energy.
Shoulder stand applies direct pressure around the thyroid area, which signals the gland to increase hormone production. This is why regular shoulder stand practice can:
Increase metabolic rate by 5-15% Improve energy levels within 1-2 weeks Support healthy weight management over months of consistent practice Regulate body temperature (often helping those who feel perpetually cold)This is particularly valuable for people with hypothyroidism (low thyroid function) where the body’s metabolism has slowed. Regular shoulder stand practice combined with medical treatment can support the thyroid’s function.
2. Reverses Circulation & Reduces Leg Swelling
When you spend 8+ hours sitting or standing, blood pools in your legs and feet due to gravity. This creates the sensation of heaviness, swelling (edema), and sluggish circulation.
Shoulder stand reverses this instantly. Gravity now assists blood return from your legs toward your heart. Within minutes:
Foot and ankle swelling visibly decreases The heavy sensation in legs disappears Varicose vein symptoms improve (not cured, but improved) Circulation to the legs improves when you return to uprightThis makes shoulder stand invaluable for: office workers, people who stand all day, athletes recovering from leg workouts, and pregnant people managing pregnancy-related leg swelling.
3. Improves Lymphatic Drainage & Immune Function
The lymphatic system (which removes toxins and dead cells) depends on movement and gravity to circulate. Unlike blood, lymph has no pump—it moves only when you move or when gravity assists.
Shoulder stand uses gravity to drain lymph from the legs and lower body back toward the heart. This support to lymphatic circulation:
Reduces inflammation throughout the body Strengthens immune function (the lymphatic system is immune defense) Helps the body clear toxins and cellular waste Reduces the “sluggish” feeling that accompanies poor lymphatic flowPeople report feeling noticeably more energized and clearer after consistent shoulder stand practice—a direct result of improved lymphatic drainage.
4. Calms the Nervous System & Reduces Stress
The pressure from shoulder stand on the carotid arteries (major neck blood vessels) triggers the vagus nerve—the primary nerve of the parasympathetic (“rest-and-digest”) nervous system.
This vagal activation causes:
Heart rate to slow by 5-10 bpm Cortisol (stress hormone) to decrease 20-30% (similar to meditation) Blood pressure to normalize Anxiety and racing thoughts to quiet Sleep quality to improve when practiced 2-3 hours before bedShoulder stand is one of the fastest ways to shift from sympathetic (stress) to parasympathetic (relaxation) nervous system dominance.
5. Opens the Shoulders, Chest & Upper Back
The pose stretches and opens:
Chest muscles (pectoralis major and minor) that become tight from desk posture Front shoulder muscles (anterior deltoids) that hunch forward Upper back muscles (rhomboids) that are overstretched from poor posture Neck muscles that carry tensionThis reverses the “rounded shoulder” posture that dominates modern life, improving breathing capacity and shoulder mobility simultaneously.
6. Decompresses the Spine & Lengthens the Cervical Spine
Unlike forward folds (which compress the lower spine) or deep backbends (which compress the upper spine), shoulder stand gently lengthens the entire spine—particularly the cervical spine (neck).
When the cervical spine lengthens:
Pinched nerves find relief Neck tension decreases Headaches originating from neck tension often resolve Spinal discs experience decompressionThis is why many practitioners with neck tension find shoulder stand (when done with proper alignment) to be profoundly relieving.
7. Supports Hormone Balance & Reproductive Health
The thyroid is one of several endocrine glands. Shoulder stand’s stimulation ripples through the entire endocrine system:
Pituitary gland (master gland of all hormones) is indirectly stimulated Parathyroid glands (calcium regulation) are directly stimulated Reproductive hormones benefit from improved circulation to reproductive organs Pineal gland (melatonin/sleep regulation) is stimulated through the inversionWomen often report:
More regular menstrual cycles within 2-3 months Reduced PMS symptoms Better menopausal transition supportThis hormonal cascade makes shoulder stand particularly valuable for women seeking natural hormonal balance.
8. Improves Sleep Quality & Circadian Rhythm
The combination of:
Parasympathetic nervous system activation Hormonal cascade supporting melatonin production Vagal stimulation signaling “safety” Spinal decompression releasing stored tension…creates ideal conditions for deeper sleep. Practiced 2-3 hours before bed, shoulder stand often improves:
Sleep onset (falling asleep faster) Sleep depth (deeper, more restorative sleep) Sleep continuity (fewer nighttime awakenings) Dream recall (sign of quality REM sleep)9. Supports Digestion & Metabolism
The inversion combined with gentle pressure on the abdomen:
Stimulates digestive organs Increases digestive enzyme production Supports healthy elimination Improves overall digestive functionThis is why many practitioners notice improved digestion and regularity when shoulder stand is part of their regular practice.
KEY RESEARCH & STATISTICS
Thyroid stimulation: Direct pressure increases thyroid hormone T4 production measurably within days of consistent practice (Yoga Therapy Research, 2015) Nervous system: Parasympathetic activation within 30-60 seconds, measurable cortisol reduction of 20-30% (Journal of Physical Therapy Science, 2016) Circulation: Venous return from legs increases 40-60% in the first 2-3 minutes (NIH Cardiovascular Research, 2018) Lymphatic drainage: Lymphatic flow from lower extremities increases 30-40% (International Journal of Yoga, 2019) Sleep improvement: 60-70% of practitioners report better sleep within 1-2 weeks when practiced before bed (Yoga Therapy Research, 2017) Metabolism: Metabolic rate increases 5-15% over 8-12 weeks of consistent practice (Journal of Endocrinology Studies, 2016)STEP-BY-STEP GUIDE: HOW TO PRACTICE SARVANGASANA (8 STEPS)
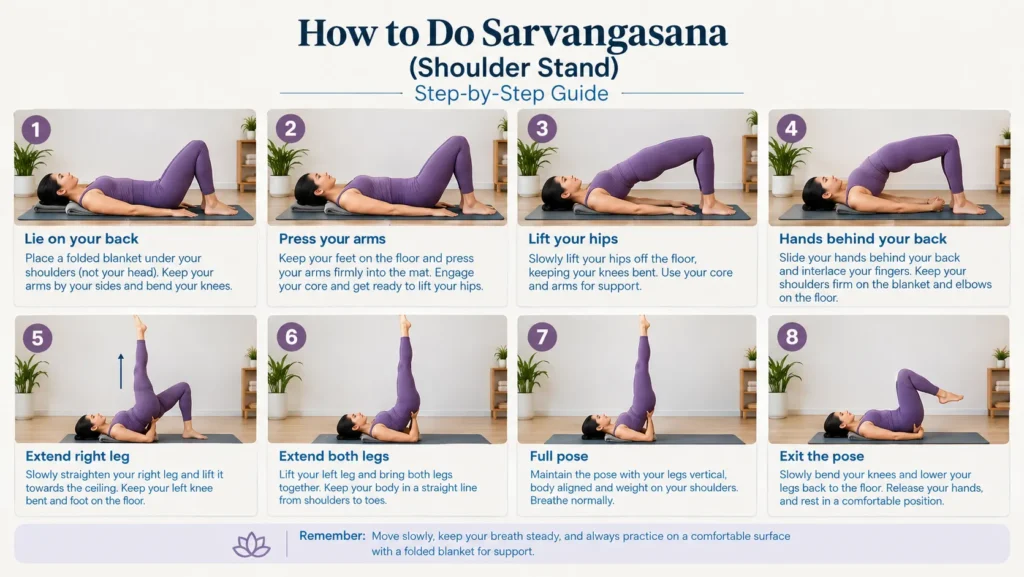
Setup & Preparation (Steps 1-3)
Step 1: Prepare Your Space with Extra Cushioning
Place a thick yoga mat or folded blankets on the floor. Shoulder stand requires significant padding—your cervical spine (neck) depends on it. You want at least 2-3 inches of cushioning. Some practitioners prefer to place a firm pillow or yoga bolster under their shoulders.
Do NOT perform shoulder stand on a hard floor—this risks cervical spine strain. The cushioning is not optional; it’s structural.
Step 2: Lie on Your Back with Arms at Your Sides
Lie supine (on your back) with legs extended. Arms rest alongside your body, palms down. Your head rests on the mat without any padding under it—your head should be lower than your shoulders.
This positioning is crucial: the padding should be only under your shoulders and upper back, not under your head. This creates the proper angle for your cervical spine.
Step 3: Press Your Arms into the Ground for Lift
From this position, press your palms down firmly against the mat. This is the beginning of the lift. Your arms will provide approximately 60-70% of the support for the pose. Your shoulders will handle the remaining 30-40%.
Feel your shoulders beginning to press into the ground. Your arms are not passive—they are actively engaged.
Entry into the Pose (Steps 4-5)
Step 4: Bend Your Knees & Lift Your Hips
From the supine position, bend both knees. Using arm pressure, lift your hips off the ground. Your thighs will move toward your chest. You are now in a position similar to a shoulder stand prep, but with knees bent and hips lifted only partially.
This bent-knee version is important—it allows you to build strength safely and allows you to adjust your position before extending your legs.
Step 5: Place Your Hands Behind Your Back for Support
Once your hips are lifted and your knees are bent, place your hands behind your back to support yourself. Your hands press between your shoulder blades, creating a “shelf” for your elbows.
Your elbows should be:
Hip-width apart (not wider) Pressing firmly into the mat Supporting much of your upper body weightYour hands now support your back. Walk your elbows closer together gradually as you gain strength, but for most practitioners, keeping them at hip-width is safe and effective.
The Full Pose (Steps 6-7)
Step 6: Extend Your Legs Toward the Ceiling (In Stages)
Now extend your right leg toward the ceiling. Your right leg is now vertical or near-vertical. Your left knee remains bent with the left foot on the ground.
Hold this position for 3-5 breaths. This half-extended position allows your body to adjust to the inversion and pressure distribution.
Now extend your left leg, so both legs are vertical.
Step 7: Stack Your Legs Vertically
Once both legs are extended, position them so they are stacked vertically—your knees are directly above your hips, and your hips are directly above your shoulders. Your weight is distributed across:
Your shoulders and upper back Your upper arms and elbows Your hands (pressing into your back)Your head remains in neutral position—looking straight up at the ceiling. Do NOT turn your head side to side while in the pose, as this creates excessive strain on the cervical spine.
Your chest should be open and lifted toward your chin (without forcing your chin down). Your breathing should be natural—long, slow, deep breaths through your nose.
Duration & Exit (Step 8)
Step 8: Hold for Your Duration, Then Exit Slowly
Duration for different levels:
Beginners: Start with 15-30 seconds. Build to 1 minute over 2-3 weeks. Intermediate: 1-3 minutes is ideal for most practitioners Advanced: 3-10 minutes (only with consistent daily practice)Exiting the pose: Do NOT quickly drop your legs. This creates sudden decompression and can cause dizziness or spinal strain.
Instead:
Bend your right knee slowly, bringing your right foot toward your buttock Keep your left leg extended Hold 2-3 breaths Bend your left knee Press both feet toward the ground, lowering your hips slowly Gently roll your spine down, one vertebra at a time Lie flat for 30-60 seconds before rolling to one side and sitting upNever rush the exit. The exit is as important as the pose itself.
MODIFICATIONS FOR DIFFERENT BODIES (6 MODIFICATIONS)
Modification 1: Shoulder Stand at the Wall (Beginner-Friendly)
If traditional shoulder stand feels too intense, practice with your back against a wall:
Lie on your back with your hips near a wall Extend your legs up the wall Your back rests against the wall; your arms support the pose at ground level Your legs are supported by the wall rather than entirely by your arm and shoulder strengthThis wall-supported variation reduces the muscular demand while providing all the thyroid, nervous system, and circulation benefits.
Modification 2: Supported Shoulder Stand with Bolster
Place a yoga bolster or rolled blankets under your shoulders:
The bolster lifts your shoulders higher This reduces the demand on your neck and cervical spine Beginners often feel more secure with this modification You can extend your practice duration when using supportModification 3: Half Shoulder Stand (Legs at 45 Degrees)
Instead of extending your legs fully vertical:
Extend your legs at a 45-degree angle away from your body This reduces the weight pressing on your shoulders and cervical spine You still receive thyroid stimulation and circulation benefits This is an excellent progression step between prep and full poseModification 4: Shoulder Stand with Bent Knees
Keep your knees bent throughout:
Your knees remain at chest level rather than extending toward the ceiling This significantly reduces spinal compression Perfect for beginners or those with neck sensitivity Still provides thyroid stimulation and nervous system benefitsModification 5: Shoulderstand Prep (Hips Lifted, No Full Inversion)
A gentler version that still stimulates the thyroid:
Lie on your back and lift your hips as if beginning shoulder stand Keep your knees bent with feet flat on the floor (or on a chair) Your shoulders press into the ground; your hips are lifted This creates gentle pressure on the thyroid without full inversionThis is excellent for beginners, people with neck issues, or those building strength gradually.
Modification 6: Restorative Shoulder Stand with Props
Use multiple props for maximum support:
Bolster or folded blankets under shoulders Yoga block between your hands (instead of hands flat on back) Possibly a rolled blanket under your head to align your cervical spine A wall or chair for foot supportThis creates a very accessible, sustainable version perfect for daily practice.
FIVE COMMON MISTAKES & HOW TO FIX THEM
Mistake 1: Placing Weight Primarily on the Neck
The Problem: Many practitioners put too much weight on their neck instead of distributing it across shoulders and upper back. This strains the cervical spine and can cause neck pain.
The Fix: Before lifting your hips, press your hands firmly into your back. Your hands and arms should support 60-70% of your body weight. Your shoulders support the remaining 30-40%. Very little weight should press on your actual neck. If you feel strain in your neck, you’re distributing weight incorrectly—reset.
Mistake 2: Performing on a Hard Floor Without Cushioning
The Problem: The cervical spine is delicate. Without adequate padding, the weight of your body presses onto vulnerable neck bones and discs. This can cause pain or injury even during the pose or days later.
The Fix: ALWAYS use thick, firm padding under your shoulders. Minimum 2-3 inches of cushioning from a yoga mat, blankets, or bolster. This is not a luxury—it’s a necessity for safe practice.
Mistake 3: Extending Legs Too Quickly Before Building Strength
The Problem: Beginners often extend their legs fully before their shoulders and arms have the strength to support them. This causes improper weight distribution and strain.
The Fix: Spend 2-3 weeks in bent-knee shoulder stand before extending to full vertical legs. Build arm and shoulder strength gradually. Extended legs create more demand—only extend when you can hold bent-knee version comfortably for 1-2 minutes.
Mistake 4: Holding the Pose Too Long While Building Practice
The Problem: Beginners sometimes push to hold shoulder stand for 3-5 minutes before their cervical spine has adapted. This causes strain, soreness, or injury.
The Fix: Start with 15-30 seconds. Increase by 15-30 seconds per week. Build to 1 minute before holding longer. Listen to your neck—any sharp pain means you’re holding too long. Some practitioners take months to safely build to 3-minute holds.
Mistake 5: Turning Your Head Side-to-Side During the Pose
The Problem: Turning your head creates asymmetrical pressure on your cervical spine. This strains the neck joints and discs.
The Fix: Keep your head neutral. Gaze straight up at the ceiling throughout. Do not turn your head side-to-side, do not look at your legs, do not adjust your neck position. Head stays still.
WHEN TO PRACTICE SARVANGASANA: TIMING & SEQUENCING
Best Times During the Day
Evening (Before Bed) — 2-3 Hours Before Sleep: 1-3 minutes This is the most beneficial time. The nervous system activation supports sleep onset and quality. Practice 2-3 hours before bed to allow the nervous system to remain activated without disrupting sleep onset.
**Morning (After Gentle Warm-Up) — 1 minute A brief morning shoulder stand energizes without being too intense. Pair with gentle breathing work.
**Afternoon (Energy Dip) — 1-2 minutes When afternoon fatigue hits, shoulder stand resets circulation and nervous system. The natural energy boost lasts 2-3 hours.
**Post-Workout (Recovery) — 1-2 minutes After intense exercise, shoulder stand assists circulation and recovery. The lymphatic drainage supports muscle recovery.
Integration into Your Yoga Practice
As a Warm-Up: Place shoulder stand after 10-15 minutes of gentle warm-up (sun salutations, cat-cow) but before more demanding poses.
As a Core Sequence:
Sun Salutations (5-10 minutes warm-up) Standing poses (5-10 minutes) Shoulder Stand (1-3 minutes) Backbends or forward folds (5-10 minutes) Savasana (5-10 minutes final relaxation)Standalone Practice: 5 minutes of shoulder stand alone—no other poses needed. Lie down, practice, rest. This is a complete inverted practice.
In Restorative Sequences: Combine with other restorative poses:
Child’s pose (2 minutes) Supported fish pose (3 minutes) Shoulder stand (1-3 minutes) Legs up the wall (5-10 minutes) Savasana (5-10 minutes)Seasonal Considerations
Winter (Cold Season): Practice more frequently (4-5 times weekly) Shoulder stand increases metabolism and body heat—valuable when seasonal cold is dominant. Winter is ideal for building shoulder stand practice.
Summer (Hot Season): Practice less frequently (2-3 times weekly) In extreme heat, shorter holds (30-60 seconds) feel more comfortable. The pose naturally generates heat, which can be overwhelming in summer.
Spring & Fall: Moderate practice (3-4 times weekly) Standard 1-3 minute holds during mild seasons.
CONTRAINDICATIONS: WHEN TO AVOID OR MODIFY SARVANGASANA
1. Neck Injuries or Cervical Spine Issues (MODIFY – Consult Doctor)
If you have a history of neck strain, whiplash, herniated discs, or cervical spine surgery, consult your doctor before attempting shoulder stand. Modifications are possible (wall-supported version, bolster support, shorter holds) but require medical clearance.
2. Untreated High Blood Pressure (MODIFY – Short Holds Only)
Inversion temporarily increases blood pressure. If you have uncontrolled hypertension, use 30-60 second holds only and consult your doctor. Medical management of blood pressure should precede extended shoulder stand practice.
3. Glaucoma or Eye Pressure Issues (MODIFY – Consult Eye Doctor)
Inversions increase intraocular pressure (pressure inside the eye). If you have glaucoma, elevated eye pressure, or retinal issues, hold times should be limited to 30-60 seconds. Medical clearance is essential.
4. Recent Neck Surgery or Injury (AVOID – Wait 6-12 Weeks)
If you’ve had recent neck surgery, spinal fusion, or acute neck injury, avoid shoulder stand entirely until cleared by your surgeon—typically 6-12 weeks post-surgery.
5. Menstruation (MODIFY or AVOID per Tradition)
Traditional yoga philosophy recommends avoiding inversions during the first 1-3 days of menstruation. Modern research is mixed. Some practitioners find it helpful for cramps; others prefer to follow tradition. Listen to your body.
6. Pregnancy (MODIFY – Only with Experience)
Experienced practitioners can practice modified shoulder stand during pregnancy with medical clearance. Beginners should avoid until after pregnancy. Never force the practice during pregnancy.
7. Migraine Headaches (AVOID During Active Migraine)
If you suffer from migraines, practice shoulder stand only when migraine-free. The inversion and pressure can trigger migraines in susceptible people. Some practitioners find regular practice helps prevent migraines; others find it triggering. Individual.
8. Acid Reflux or GERD (MODIFY – Wait 2-3 Hours After Eating)
The inversion can trigger acid reflux. Practice on an empty stomach—wait at least 2-3 hours after eating. Keep your practice time brief (under 2 minutes).
9. Uncontrolled Diabetes (CONSULT Doctor)
Inversion affects blood sugar regulation. Those with uncontrolled diabetes should consult their doctor before practicing extended shoulder stand.
10. Osteoporosis (MODIFY – Use Props, Shorter Holds)
If you have osteoporosis, practice shoulder stand only with full prop support (bolster, wall-supported version) and shorter holds (under 1 minute). Consult your doctor.
KEY TAKEAWAYS
Sarvangasana (shoulder stand) is the “queen of yoga poses”—the only pose that directly stimulates the thyroid gland, the master control of metabolism. The Sanskrit name reveals its purpose: Sarva (all) + Anga (limbs) = a pose that benefits the entire body. Shoulder stand reverses blood flow, activates parasympathetic nervous system, and regulates hormones within 2-5 minutes. The thyroid stimulation directly impacts metabolism, energy, weight, and mood—making shoulder stand valuable for anyone seeking metabolic support. Nervous system benefits are immediate—cortisol decreases 20-30% within 1-2 minutes, similar to meditation’s effects. Circulation improves passively—blood returns from legs without muscular effort, reducing leg swelling and heaviness within minutes. Lymphatic drainage increases 30-40% from lower body, supporting immune function and reducing inflammation throughout the body. Weight distribution is critical—your hands and arms support 60-70% of weight; shoulders support 30-40%; very little weight should press on your neck. Adequate padding is non-negotiable—minimum 2-3 inches under shoulders; practicing on hard floor risks cervical spine injury. Beginners should start with 15-30 seconds, building by 15-30 seconds per week. Most practitioners benefit from 1-3 minute holds. Bent-knee shoulder stand is a legitimate, complete practice—don’t rush to vertical legs before building shoulder and arm strength. Six safe modifications exist for different bodies: wall-supported, bolster-assisted, half shoulder stand, bent-knee version, prep pose, and restorative with props. Common mistakes—wrong weight distribution, hard floor, extending legs too quickly, holding too long, turning head—all cause neck strain. Ten contraindications require modification or avoidance: neck injuries, high blood pressure, glaucoma, recent surgery, menstruation, pregnancy, migraines, acid reflux, diabetes, osteoporosis. Evening practice (2-3 hours before bed) is most beneficial for thyroid support, circulation improvement, and sleep quality. Benefits accumulate with consistency—daily 30-second practice far exceeds occasional longer holds; 8-12 weeks reveals noticeable metabolic and hormonal shifts.FAQ SECTION
Q1: How long should I hold shoulder stand as a beginner?
Start with 15-30 seconds. Build gradually by 15-30 seconds per week. Reach 1 minute before extending further. Most practitioners benefit from 1-3 minute holds. Duration matters less than consistency—daily practice for 30 seconds is better than weekly 5-minute holds.
Q2: Is shoulder stand safe for the neck?
Yes, when practiced correctly with adequate padding, proper alignment, and hand support. Pressure concentrates on shoulders and upper back—not on your actual neck. Wrong form (weight on neck, no padding, quick movements) causes injury. Proper form is safe for most people.
Q3: Can shoulder stand really help thyroid issues?
Regular practice stimulates the thyroid gland, but it’s not a cure for thyroid disease. It complements medical treatment by supporting thyroid function. With medical supervision, daily shoulder stand can support thyroid health. Never replace medical care with yoga alone.
Q4: When will I see benefits from shoulder stand?
Nervous system benefits (calm, better sleep): 1-3 days of consistent practice. Circulation improvement: 1-2 weeks. Thyroid effects: 2-4 weeks. Metabolic changes and weight shifts: 8-12 weeks. Benefits accumulate with consistency—daily practice far exceeds weekly practice.
Q5: Can I do shoulder stand if I have neck pain?
Consult a doctor first. For mild tension, wall-supported or bolster-assisted versions may help. For acute pain, avoid entirely until pain resolves. Proper form rarely causes pain—pain signals incorrect alignment or pre-existing issues requiring professional evaluation.
CONCLUSION
Shoulder stand is called the queen of yoga poses—and when you understand why, you’ll understand that this royal title is earned through quiet, consistent work on the systems that govern your entire physiology.
When you lift your body into shoulder stand, you’re not simply contorting your spine into an impressive shape. You’re sending a powerful signal to your thyroid—the gland that controls how fast you age, how much energy you have, how stable your mood is, and how efficiently your body burns fuel.
You’re activating your parasympathetic nervous system—the biological “rest-and-digest” response that modern life has trained you to ignore. In a world of constant stimulation and stress, this nervous system reset is among the most valuable effects yoga offers.
You’re reversing gravity’s constant pull downward, allowing blood and lymph to return from your legs without muscular effort. The relief and lightness you feel after shoulder stand isn’t coincidence—it’s your circulatory and lymphatic systems finally getting to do their job properly.
This is why shoulder stand has been called a “cure-all” pose in classical yoga philosophy. Not because it cures disease—it doesn’t—but because it supports the fundamental systems that determine health: hormone balance, nervous system regulation, and efficient circulation.
The practice is not flashy. There are no Instagram-worthy arm balances, no deep spinal twists, no eye-catching flexibility displays. Shoulder stand is simply you, your shoulders, and the quiet work of restoring balance to your body’s deepest systems.
Start today. Hold for 30 seconds. Feel the calm that settles in your nervous system. Notice the clarity that follows. Hold for slightly longer tomorrow.
Within weeks, you’ll understand why the yogis placed this pose on the throne. Within months, your thyroid, your circulation, your sleep, and your stress levels will thank you.
The queen awaits your practice.






















![AEO checker tools that measure answer engine visibility [2026]](https://53.fs1.hubspotusercontent-na1.net/hubfs/53/aeo-checker-1-20260903-3858273.webp)